主流程式語言大多可以跨平台作業,但對 .NET 來說是個新鮮事,這次就來分享將 API 部署到 Linux。
Create a VM
首先請準備一台 Linux 主機,可參考快速建立 Compute Engine。
這次範例是使用 Debian 9
Dependencies and Requirements
接著安裝 ASP.NET Core 環境依賴關係和要求:
- Install .Net Core 3.1
- 安裝前請先註冊 Microsoft 金鑰和套件摘要:
1
2
3
4
5
6
7
8
# 註冊微軟金鑰 wget -O- https://packages.microsoft.com/keys/microsoft.asc | gpg --dearmor > microsoft.asc.gpg sudo mv microsoft.asc.gpg /etc/apt/trusted.gpg.d/ # 註冊產品存儲庫 wget https://packages.microsoft.com/config/debian/9/prod.list sudo mv prod.list /etc/apt/sources.list.d/microsoft-prod.list sudo chown root:root /etc/apt/trusted.gpg.d/microsoft.asc.gpg sudo chown root:root /etc/apt/sources.list.d/microsoft-prod.list - 透過套件管理(apt-get)安裝 .NET Core:
1
2
3
4
5
6
# Install apt-get enable SSL sudo apt-get update sudo apt-get install -y apt-transport-https # Install the .NET Core runtime sudo apt-get update sudo apt-get install aspnetcore-runtime-3.1
- 安裝前請先註冊 Microsoft 金鑰和套件摘要:
- Install Nginx
- 安裝反向 Proxy 伺服器:
1apt-get install -y nginx - 設置站台:
修改 /etc/nginx/sites-available/default1 2 3 4 5 6 7 8 9 10 11 12 13 14server { listen 80; server_name example.com *.example.com; location / { proxy_pass http://localhost:5000; proxy_http_version 1.1; proxy_set_header Upgrade $http_upgrade; proxy_set_header Connection keep-alive; proxy_set_header Host $host; proxy_cache_bypass $http_upgrade; proxy_set_header X-Forwarded-For $proxy_add_x_forwarded_for; proxy_set_header X-Forwarded-Proto $scheme; } } - 重新載入設定:
1sudo nginx -s reload
- 安裝反向 Proxy 伺服器:
- Deploy your api
請將你的 api 放置到這個位置 /var/www/your_api。 - Monitor your api
- 新增服務:
/etc/systemd/system/sample_api.service1 2 3 4 5 6 7 8 9 10 11 12 13 14 15[Unit] Description=.NET Web API running on Debian [Service] WorkingDirectory=/var/www/sample_api。 ExecStart=/usr/bin/dotnet /var/www/sample_api/sample_api.dll Restart=always # Restart service after 10 seconds if the dotnet service crashes: RestartSec=10 KillSignal=SIGINT SyslogIdentifier=dotnet-api User=www-data Environment=ASPNETCORE_ENVIRONMENT=Production Environment=DOTNET_PRINT_TELEMETRY_MESSAGE=false [Install] WantedBy=multi-user.target - 啟動服務:
1
2
sudo systemctl enable kestrel-helloapp.service sudo systemctl start kestrel-helloapp.service
- 新增服務:
完成後,你可由瀏覽器或 curl 作個測試:
|
|
Deployment Script
建立自動化腳本 gce-startup.sh。
|
|
這次範例所製作的腳本,每次部署都會建立全新的 VM 來部署程式,但在容器的部署上,會由 Image 持續來更新 Container,有機會在另外說明。
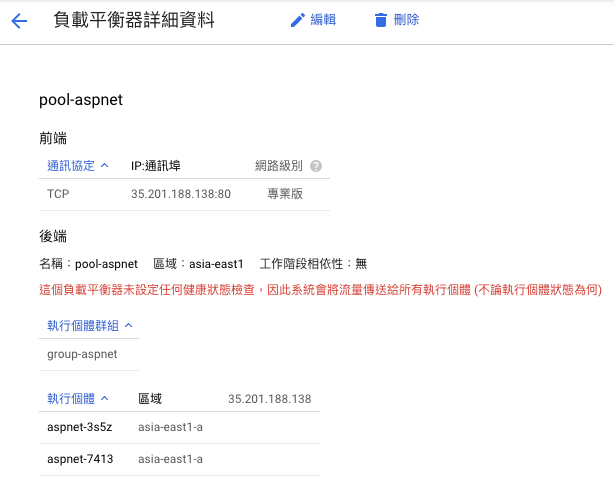
Load Balance
最後來介紹一下如何建立負載平衡(Load Balance),因為這次 Host 是使用 GEC,透過 GEC 執行個體群組和剛建立的自動化腳本就可快速完成,修改一下腳本 gce.sh:
|
|
e.g.